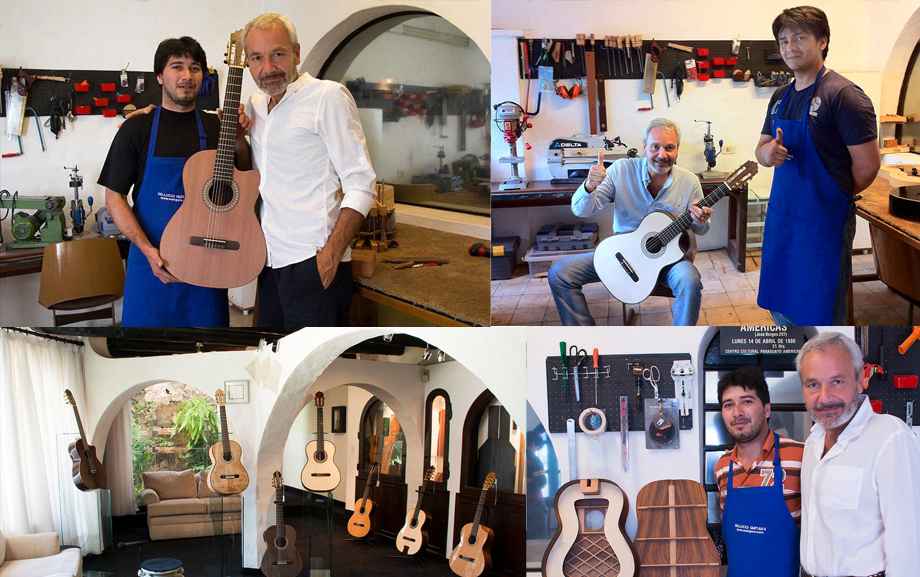
Bellucci Guitars Workshop
Bellucci guitars take anywhere between 150 and 300 hours to build depending on the type of construction.
Below you'll find a description of the steps required to transform wood into marvelously sounding and stunning looking concert guitars.
Inlaying the rosette
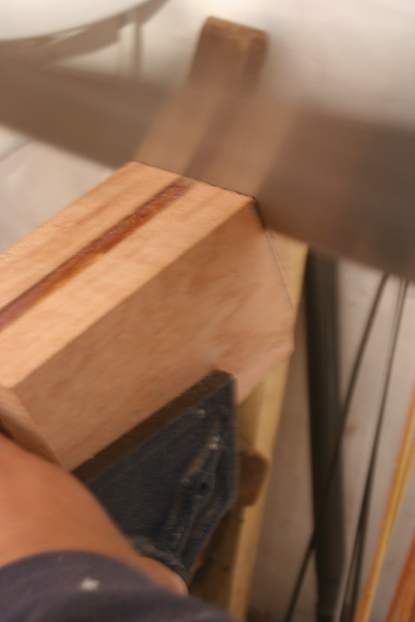
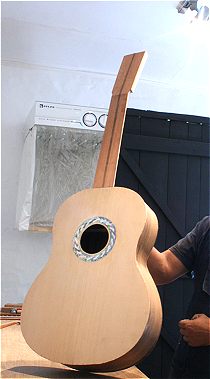
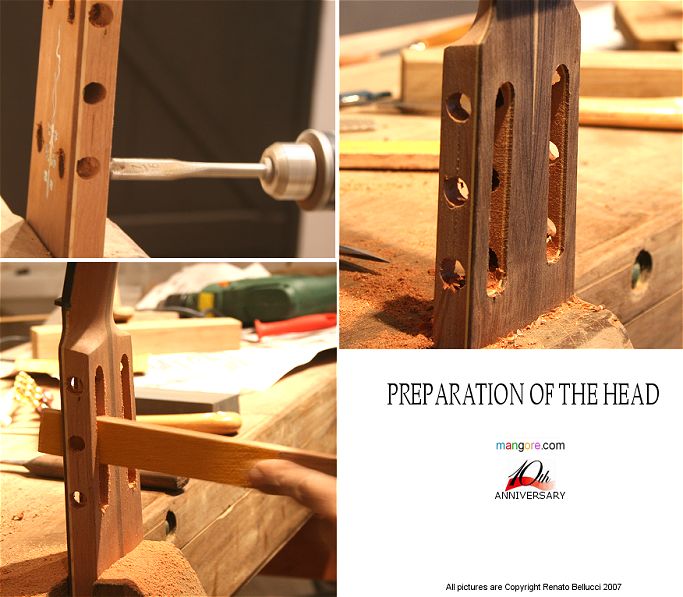
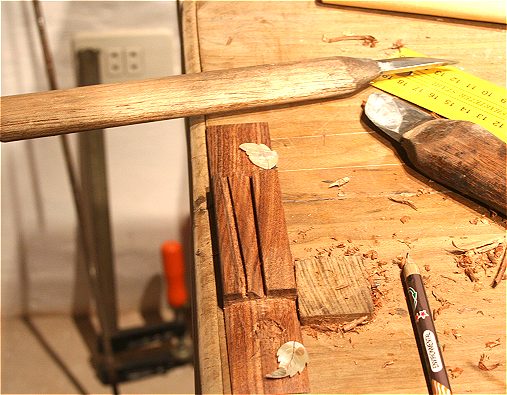
Preparing the headstock
Closing the Guitar
French Polish
Mirror Finish
Mounting the Tuner
I dedicate my work to God
Masters with the Knife
Work with the linings and bindings
Preparing the Neck
Assembling the neck
Mounting the neck
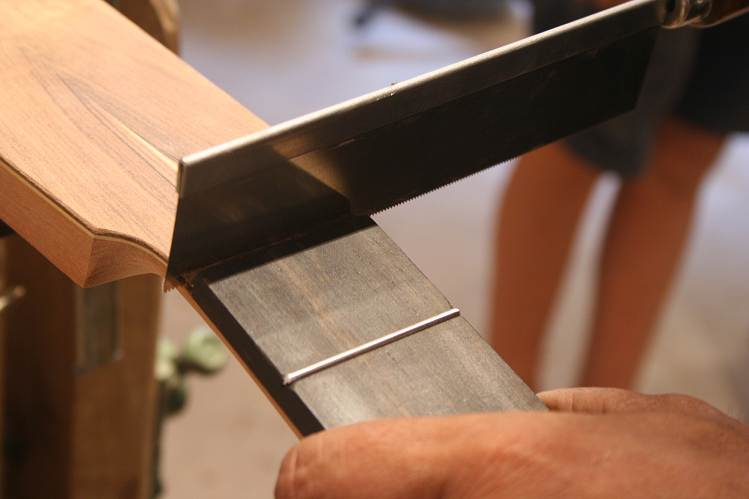
Preparing the fingerboard 07-22-2013
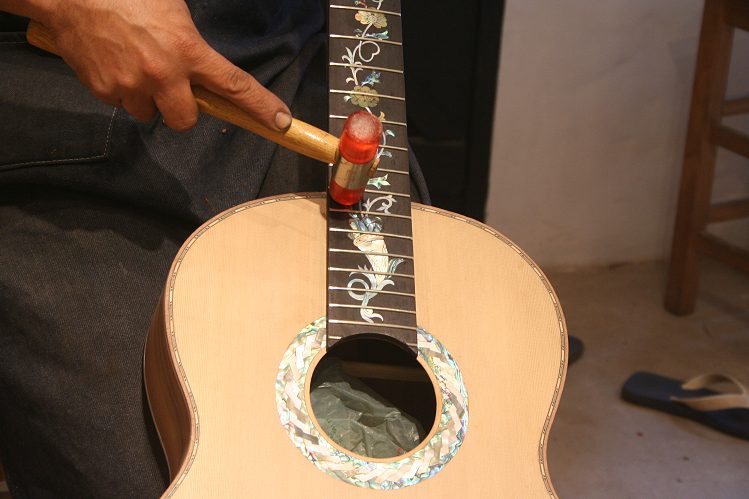
Fretting the guitar 07-23-2013
Inserting the wood marquetry 07-25-2013
Drawing the Hauser Fan Brace 07-08-2013
Gluing the Hauser Fan Brace 08-08-2013
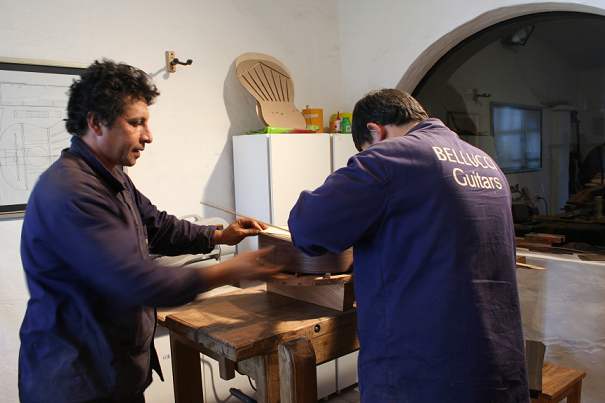
Domingo, Reinaldo, Roberto & Daniel are my luthiers. They build all my concert guitars. Juan Angel is their assistants and luthier apprentices. Juan is the lacquerer. Every master builder works with an assistant and luthier apprentice. They started building guitars at the age of 4 and learned the skill from their father. I know for a fact that no other guitars company has build concert guitars using over 40 varieties of tone woods for the back and sides alone. We build 6 different types of concert guitar construction (Torres, Hauser, Lattice, Double top w/Nomex and Doble tapa with its variations). We are constantly experimenting and my team of luthiers consists of some of the most skilled woodworkers I ever met. The workshop is attached to my studio and a tempered glass separates the workshop from the place where I practice. I make sure that the luthiers are supplied with all the tools necessary to produce top of the line instruments. The work setup is made of a combination of typical and extremely practical wood tools built by the luthiers themselves and a few state-of-the-art tools and power tools that ensure that maximum precision is attained during some critical phases of construction. A second workshop, is used for the final detailing, lacquering of the instruments. I see some of the finest instruments come to life every day and I thank both my faithful builders and my generous buyers for allowing me this privilege and gift.
Click the pictures to enlarge
1
2
3
4
5
6
7
Joining the 2 halves of the top
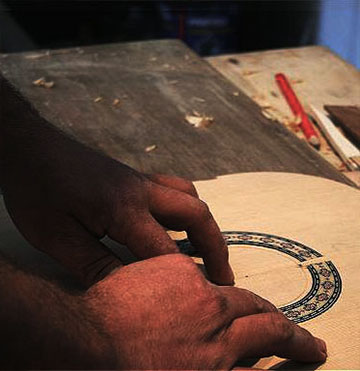
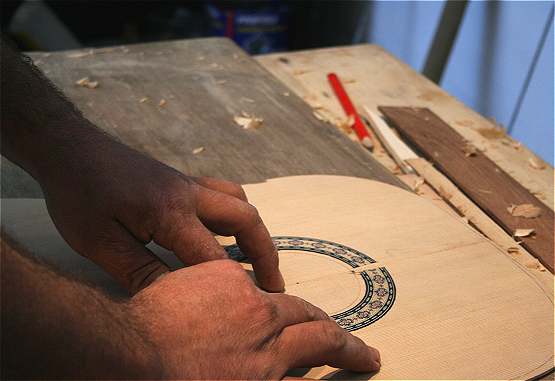
After routing the top, the rosette is inserted
Bellucci Guitars are the result of hundreds of hours of passionate work and dedication. It all started in Italy in 1968. Andres Segovia, Narciso Yepes and Abel Carlevaro were my guitar teachers and are the men responsible to make the seed of music germinate and grow in me with every passing year. My love for luthery was infused early in my life when my grandfather, Ettore Bellucci, gave me an old Neapolitan Mandolin as a gift when I was 7 years old. The Old instrument which I still keep in my studio was the instrument my grandfather used to serenade my grandmother Maria. The old Mandolin soon became my favorite toy and as a result, my parents bought me my first guitar and hired a top classical guitar teacher from Southern Italy to teach me the art of classical guitar playing. In the mid 70's my parents moved Paraguay, South America, the homeland o Agustin Barrios Mangore, the greatest composer the classical guitar has ever known. Paraguay is a country with a long tradition in guitar construction that dates back to the Jesuit Reductions of the 15th Century.
The match was one made in Heaven: on one hand my passion for the guitar, the deep knowledge of the classical repertoire and the thorough understanding of the specific demands of a professional player and on the other, the specialized skill of some of the finest woodworkers in the region with a skill that has been passing from one generation to the other for centuries. Add to this the legendary aura that "the land of Mangore" adds to each Bellucci creation and you'll understand how these beauties come to life
Click the pictures to enlarge

8

9
10
10a

11
12
13
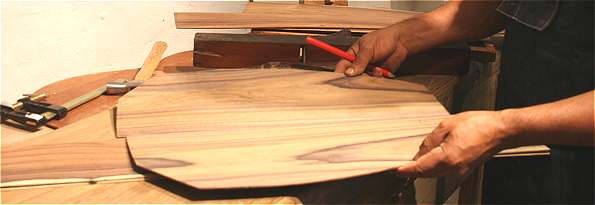
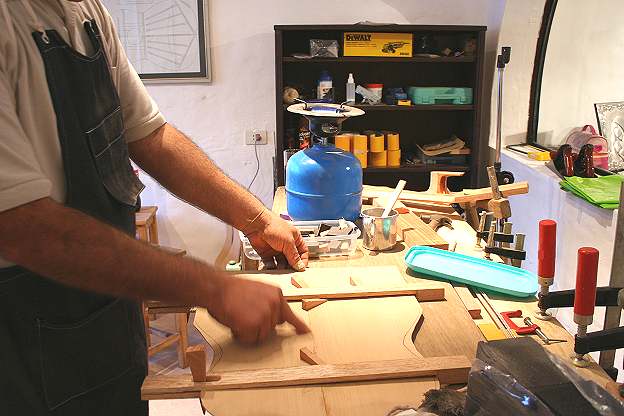
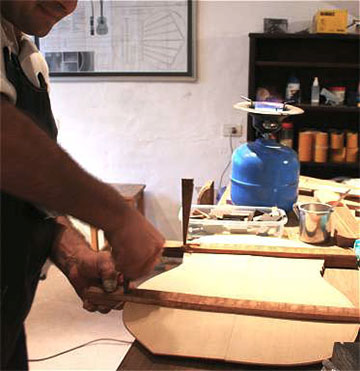
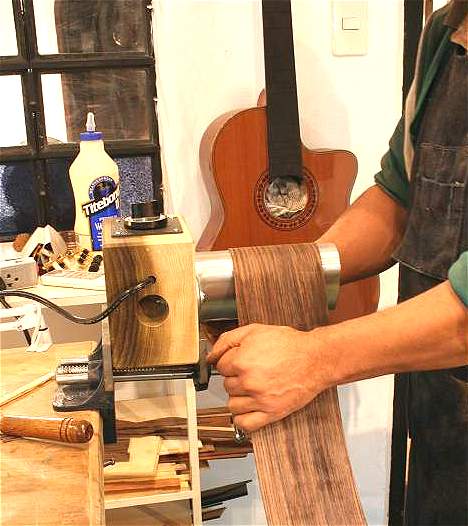
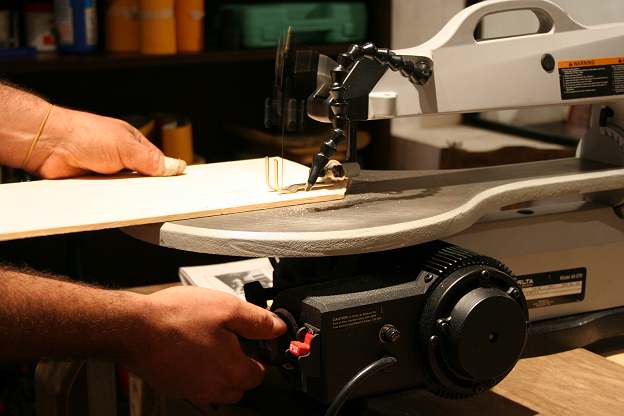
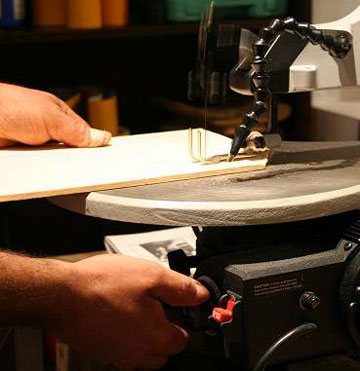
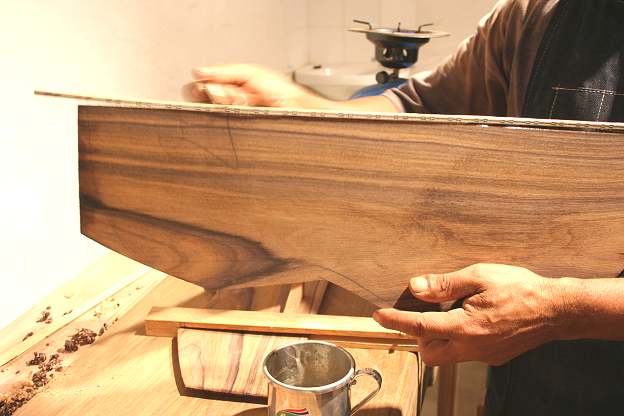
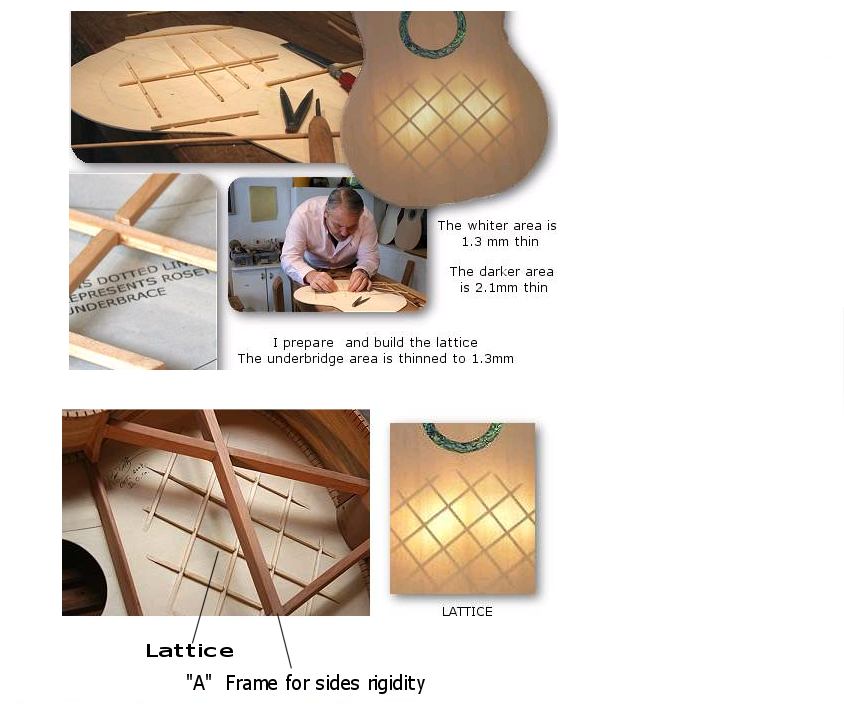
The construction begins with the preparation of the woods for the back and sides (Image #1). These are sanded to approximately 2.5 mm. Thinning goes up to 1.3 mm with the optional lattice bracing (Image #25). The final thinning is done in steps with a plane and a scraper (Image #17). The luthier will be able to tell which piece of the back and sides goes where only after scraping, planing and sanding. A caliper is used to check the thickness of the woods and thus, avoid going beyond the optimal point. Joining the two halves of the top requires experience and precision in order for the 2 parts to match perfectly and this is perhaps the hardest one of the skills to be acquired by the luthery student (Image #2-3-4-5-6)
Closing the guitar
When the 2 halves are joint, the builder begins a long period of tapping, scraping and planing in order to bring the top to its maximum resonating thickness. A sound which is a B-Bb in pitch is usually the ideal although other pitches have proved to be optimal with certain species of tone woods. Thickness of the top usually goes from 1.7 mm in the outer fringe of the soundboard to approximately 2 mm towards the center. These numbers vary slightly from one top the next. The rosette inlay is prepared and the rosette is mounted (Image #7-8). Most of the measures of the thickness of each wood used is decided on the spot and are unique with every guitar. This is the main reason why concert guitars are always better sounding instruments than factory guitars. The woods are thinned to the ideal thickness based on tap tone. I am often called in to help the luthiers hit the right tone during tapping. The combination of woods used for the back and sides fan brace of the top and internal construction of each instrument is unique and different from the preceding one.
The fans are held in place a pressure gig
I designed
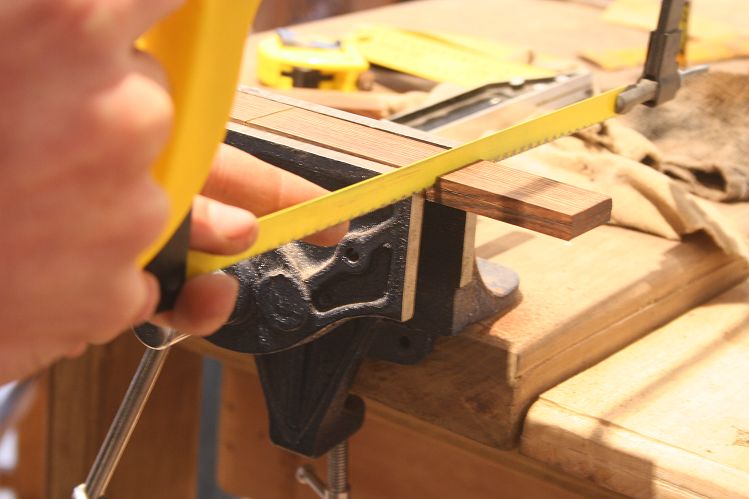
Power tools to cut the fan braces
for the top
Preparation of the Headstock
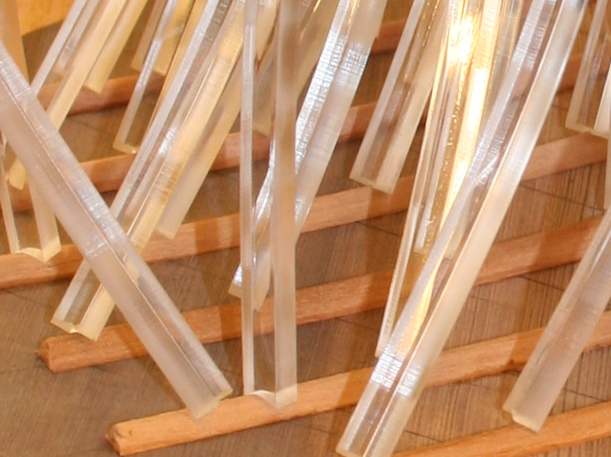
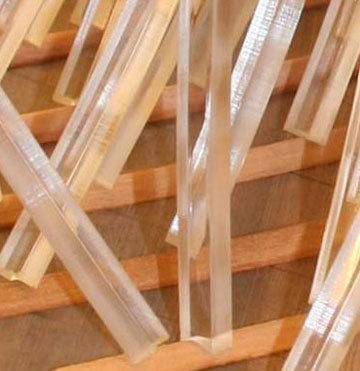
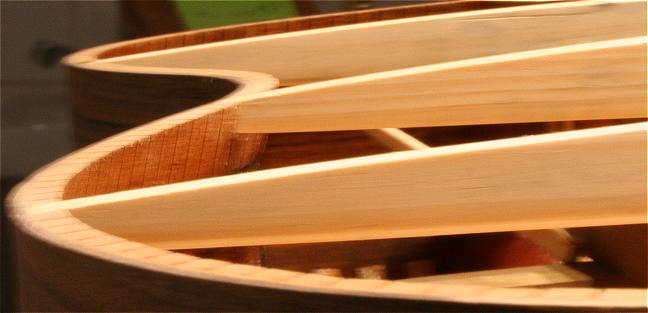
The fan brace is glued in a special gig I designed that pushes the fan brace tightly into the top. The gig also puts pressure during the gluing of the bridge reinforcement. The pressure is applied with the top facing a concave surface that will help to make the top in a domed fashion (Image 10a). Domed tops are especially necessary with Double top construction and lattice where the thinning of the woods is greater. The dome makes the wood more resistant (Images #9-10 & 10a). The gig is what will give the instrument the necessary curvature to counter the pull of the bridge and keep it under tension for optimum production of volume. We use the same "pressure system" for the Doble tapa Contreras style. Concert instruments have very thin tops when compared to factory built guitars and without the curvature they would give in to the pressure created by the bridge. The acrylic struts you see in figures 9 and 10 are used to create the down pressure in the receiving concave surface. They push the fan brace and the top in the concave surface where drying of the glue will occur leaving behind the dome shape as a result (Image #10a)
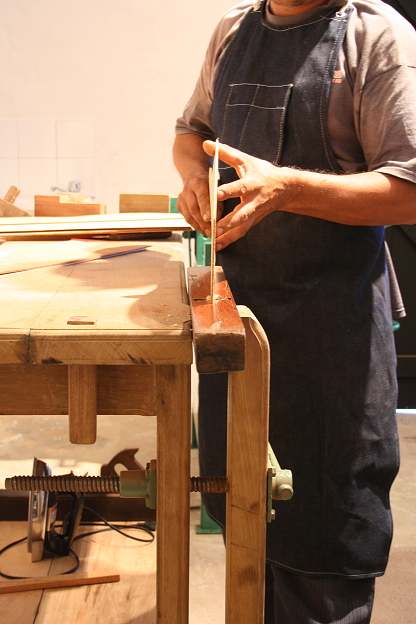
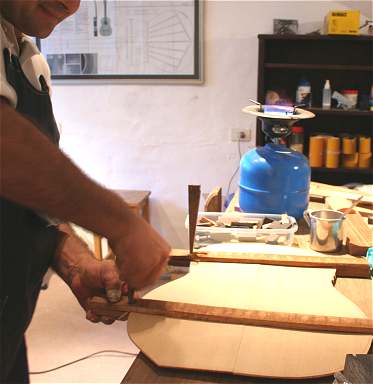
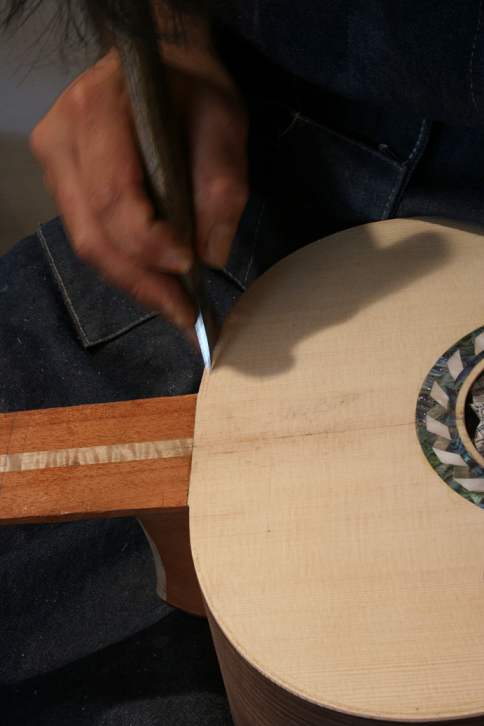
Masters with the knife
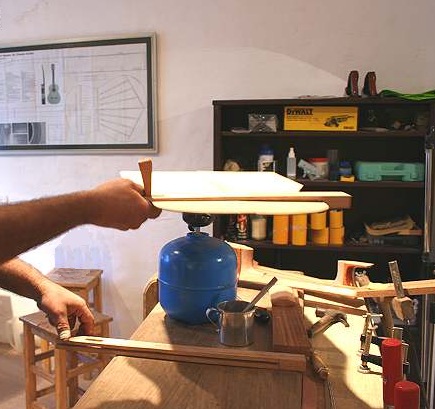
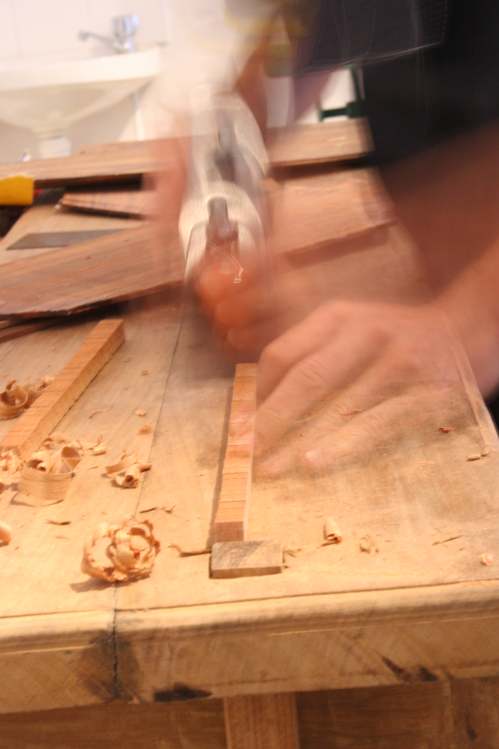
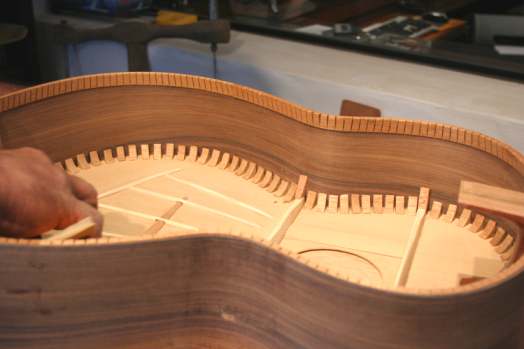
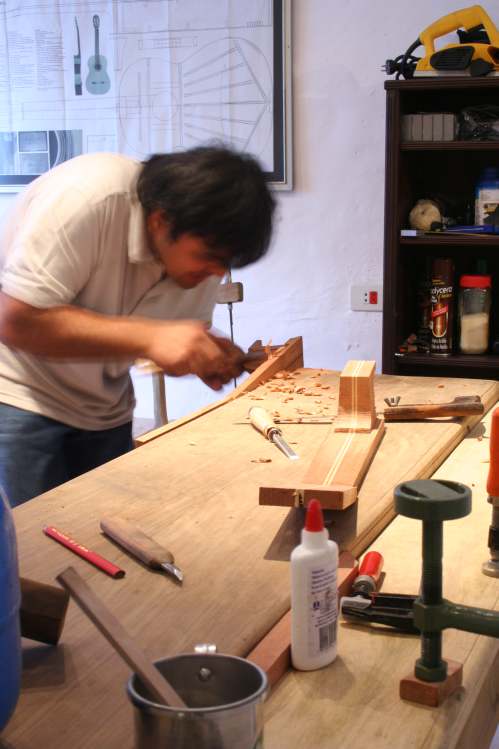
The sides are bent with a heated iron (Image #12) and using a special watery solution to spray the wood. Preparation of the struts and kerfs for the assembly of the back, sides and top begins (Image #11-13). A lot of experimenting is invested in the choice of the strutting and general structural woods that are used inside the body of the guitar. Spruce, Mahogany, Balsa and Cedar are used in a myriad combinations to achieve different results and depending on the type of construction.
Click the pictures to enlarge
14
15
16

17
18

19
20
21
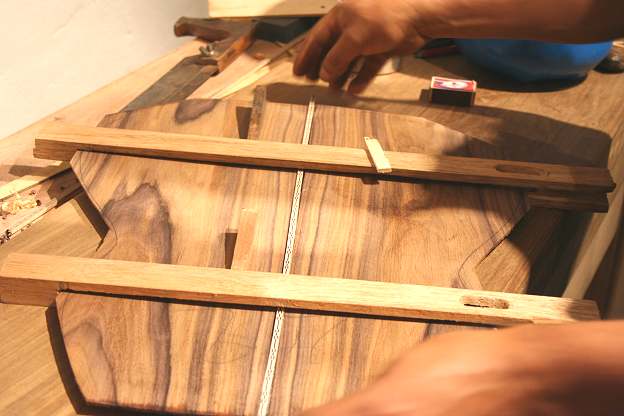
The sides are mounted in the guitar chair (Image #14) in order to achieve the symmetrical shape of the instrument perfectly. The halves of the back are joint (Image #15-16-17-18) and lacquered (Image 19) . We lacquer the inside of the guitar as well, to preserve the humidity, protect the woods and make cleaning of the inside of the guitar easier. Only a handful of builders worldwide offer this special treat (Image 19).
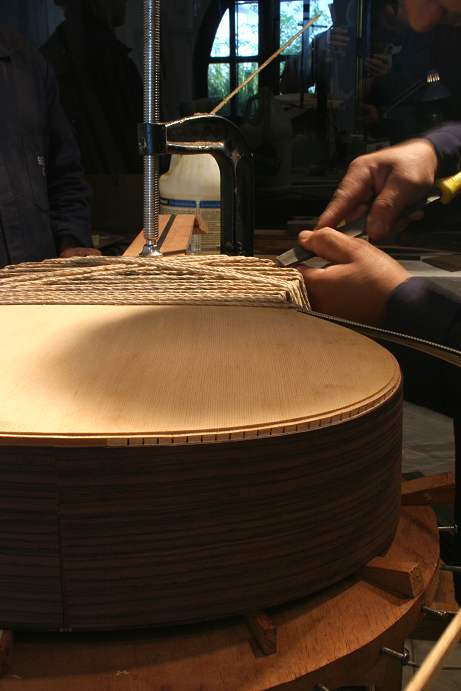
Gluing the Kerfs that hold the top
The guitar is closed and tied to the chair
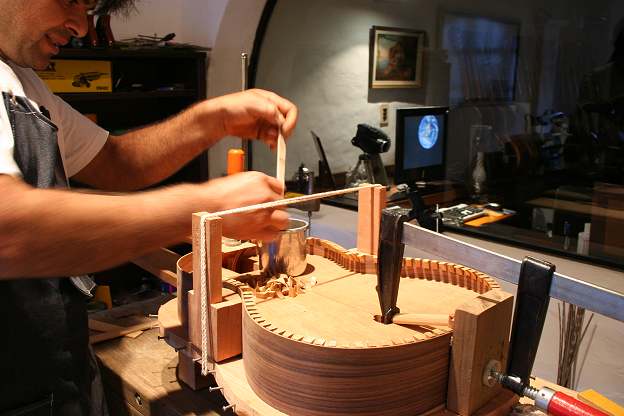
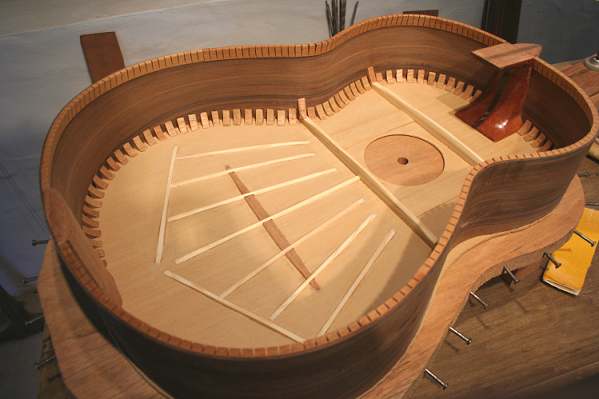
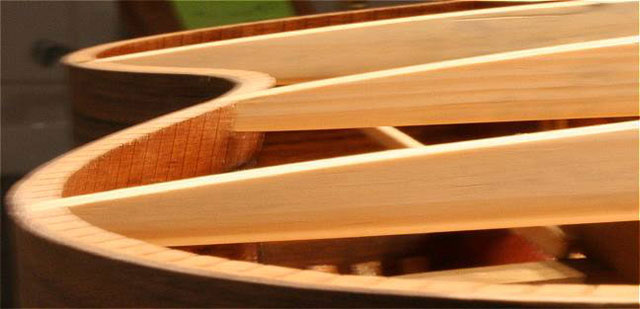
The fan bracing of the guitar is assembled (Image #22-23). The top is ready to be glued. Reinforcing struts are placed under the top in order for these to withstand the tightening of the cotton rope which will follow (Image #36). A tight cotton rope that crosses several times over the top of the instrument ensures a perfect bonding of the sides with the top (Image #15-16). This is quite a dramatic scene and the guitar parts are literally being fused into 1. Parts of the neck are already prepared and assembled.
Click the pictures to enlarge
22
23
24

24a
25

26

27

28
The fan bracing we use is the one from the 9 fans 1943 Hauser (Image #23). After the final tapping (Image #7) and sanding (Image #50), the top is examined looking through a 40 Watts light bulb (Image #26-27). If the thinning was good, light will pass through the wood. The light passes through very easily in the lattice braced tops (Image #25). In the picture above where I show the double top with Nomex -also known as hollow top- against the light (Image #27), you can appreciate the Nomex cells (Image #28) that show against the light...
The doble tapa was developed and introduced by Master Luthier Manuel Contreras the II at the end of the 70s and reached its peak in the 80s. The word "Tapa" in Spanish translates to top in English but it refers to the back of the instrument. Therefore, Contreras doble tapa is actually a "Double back". He developed a few variations.
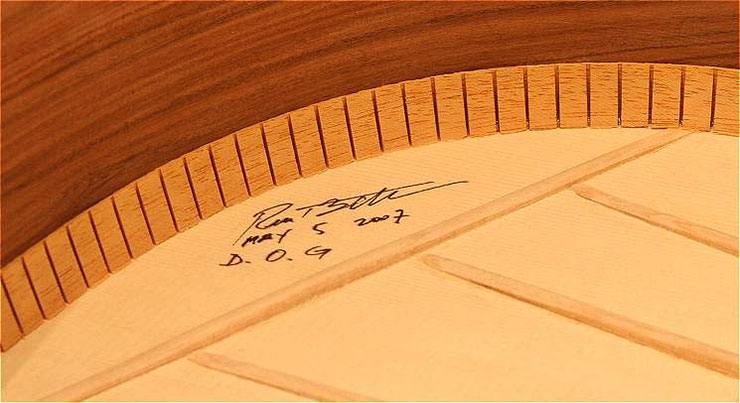
29. I sign D.O.G. Deus Omnis Gloria (To God all the glory) inside my guitars
The only drawback of the all wood Double top from a builder's point of view is the tremendous amount of time it takes to build a single instrument. Still, I make a point in offering these amazing instruments at down to Earth price to allow as many players as possible to consider purchasing a Double top (Image #24-24a).

Preparation of the indented cutaway
Regarding 650mm or 640 mm guitar construction, keep the following rule at hand: If the distance between the tip of your thumb and the tip of your little finger is equal or less than 9 in. when fully stretched, use 640 mm. In over 33 years teaching and playing the classical guitar and having worked closely with such great teachers as the Spaniard Jose Tomas and the Uruguayan Abel Carlevaro, it came clear to me that often hard to polish musical passages were not the fault of the player but a fault of the scale used for the fingerboard. Modern guitar construction is no longer dependent on scale length to produce a substantial volume. When we talk about scale length we are talking to the relative distance of the frets from one another... we are talking millimeters or fraction of a millimeter, but it is these fractions that make all the difference between flawless and sloppy technique....let alone the great frustration that derives from never being able to polish a given musical passage.
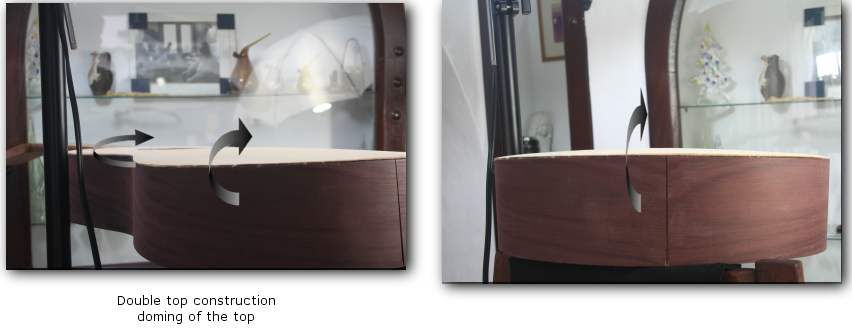
Concert guitar: Doming the back with curved struts. "Factory guitars" are flat.
I offer the option of lattice without the violin style string tie for those players looking for a more standard looking guitar... still, most buyers request that I mount the tie for aesthetically reasons and because it prolongs the life of the top exponentially. When I build without the tie, I use 2 African blackwood crossed reinforcements in the lattice brace.
The top of the guitar is like the vocal chords on a singer: crucial ! I pass the tops signing each one and I also add the date (D.O.G. stands for Deo Omnis Gloria, All the glory to God) (Image #29) I was taught from an early age to offer Him the fruit of my labor. I constantly ask myself: Would God like this instrument? Preparation of the neck begins (Image #20).
Click the pictures to enlarge

30
31
32

33
34
35

36
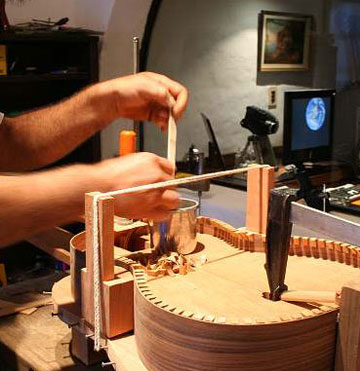
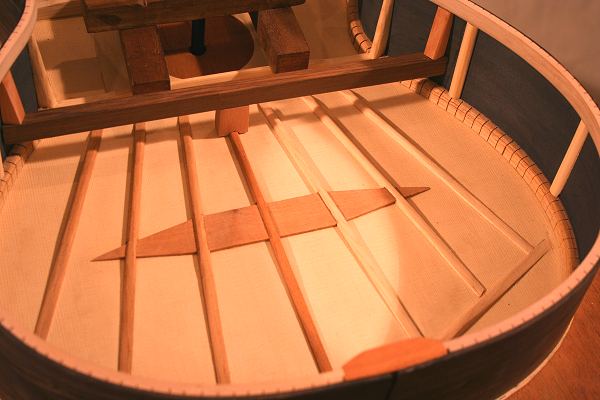
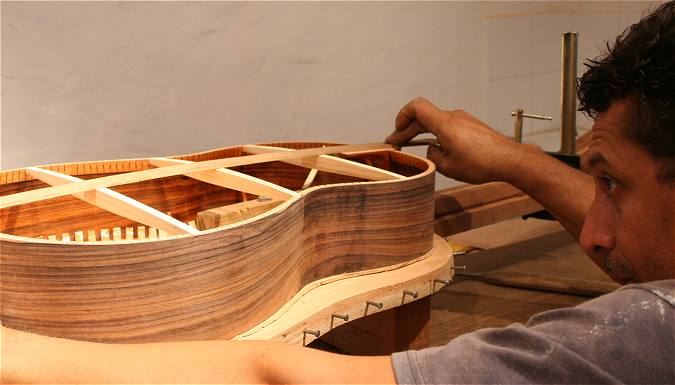
The struts that hold the back are filed and glued to the kerfs and linings (Image #28). Note the slight dome like curvature (Image #33-34-35). (See also Bellucci Phase 3 concert guitar enhancements) Both the top and the back of high end concert guitars are slightly curved like a dome. This is to counteract the forces of gravity that would otherwise push both the top and the back into the guitar body and to create a larger reverberating volume of air. The reinforcing spruce pillars that will withstand the pressure of the ropes during gluing (Image #38) are put in place (Image #36).
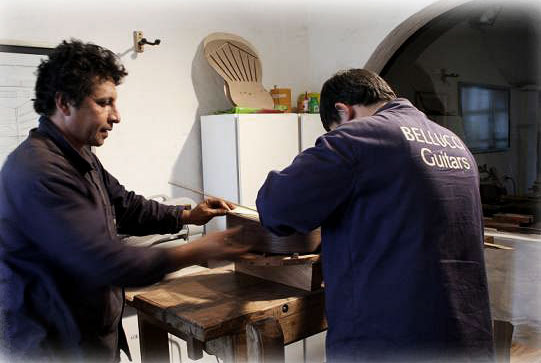
Only the master builders can perform this task, usually in pairs (Image #37). The doming of the top is more pronounced in lattice and double top construction.
Click the pictures to enlarge
37
38
39
40

41
42
43
44
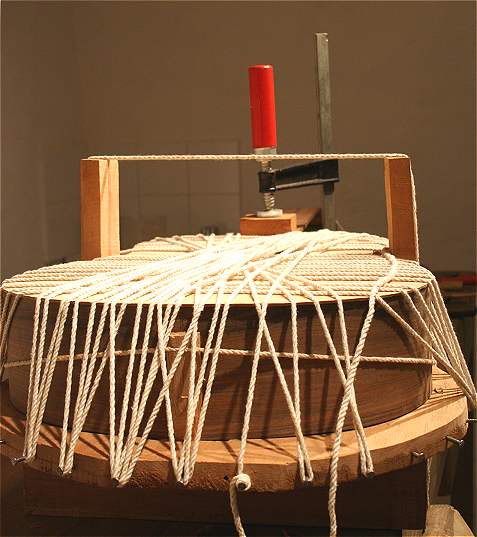
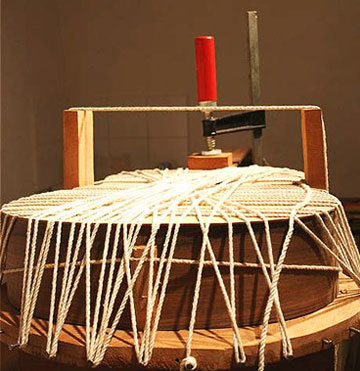
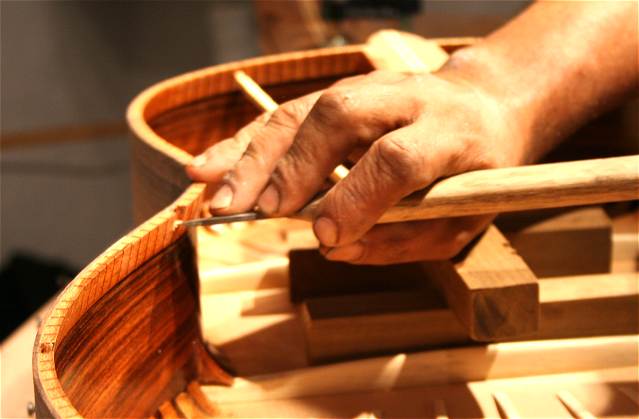
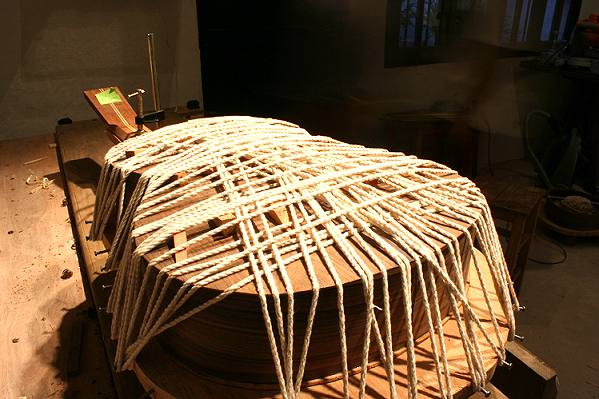
Glue is applied and the cotton rope is tightened (Image #38). A few hours later, the guitar is free (Image #39) to enter the final phase of construction. The guitar soul, it's sound is complete when the guitar is removed from the construction seat. I tap the guitar all around to check on her character. The sound is already blossoming... The route for the bindings and the purflings is carved all around the top and sides (Image #41-42).

Gluing the back is perhaps the most dramatic moment of guitar construction.
The cotton rope
pushes the back on the curved struts in order to achieve the desired doming of the back.
I use some gorgeous and rare Paraguayan, Asian and African species of wood to decorate parts of the head, bindings, bridge and armrest of the instrument. The frets are mounted (Image #44) and the seat for the nut bone is prepared (Image #49). Construction of the bridge and the head begins (Image #45).
French Polish
Mirror Finish
Click the pictures to enlarge
45
46
47
48

49

50

51
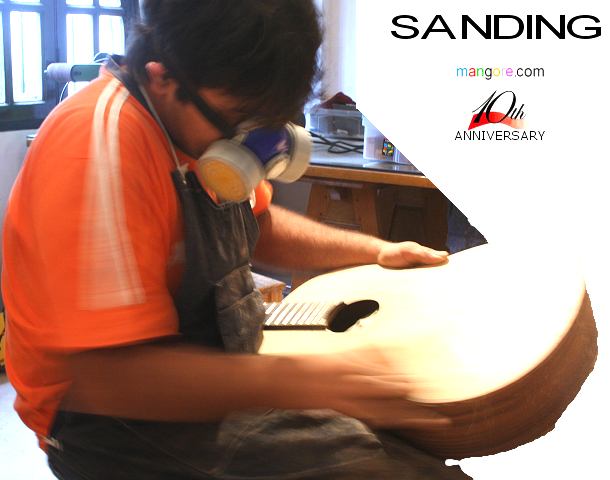
The bridge is carved (Image #46) just like the neck. The mother of pearl applications are presented and the place where the applications will be inlaid is carved. The guitar is ready to be sanded. Protection breathing gear is used (Image #48) because some woods expedite powders that can be harmful (African Blackwood, Brazilian rosewood...). The guitar is ready to be finished.
If you have been on the web long enough, you'll read a lot of nonsense regarding what type of finish best suites a classical guitar. It is essential that you know that the type of finish will not make any difference whatsoever on the type of sound your guitar will produce. I have used French polish, Nitrocellulose and Polyurethane on a regular basis and I can assure you that there is no perceivable difference in the sound produced by the guitar regardless of the type of finish you may choose. Generally speaking, all finishes elevate the pitch of the instrument a little (although most people will not notice the difference). The finish was first introduced to bring out the grain in the woods and offer some type of protection against the elements. Polyurethane is also the most laborious. It requires a lot of space, air compressors, protective gear and luthiers willing to do a lot of sanding and clean up work. This is the main reason why most European and US builders will try to convince guitar buyers that French polish is better. It is not ! It is easy to apply and requires little or no infrastructure and practically no space to work and, since most US and European workshops are small, it fits Northern hemisphere builders to perfection.
French polish offers very little or no protection at all. Before I started building guitars in 2004, I owned 3 instruments that were French polished and as soon as I could change the finish on them to Polyurethane, I did so. Unfortunately, due to the little protection that French polish has to offer, the woods were no longer as beautiful as they were originally. Sweat had stained parts of the guitar and in some places dirt accumulated to a point that it changed the overall appearance and sound of the instrument.
We apply the wood pores sealer with a brush and the lacquer with a small compressor (Image #52). Finish is not merely aesthetical. The finish defines the sound of the instrument. Although we buy the lacquer commercially, we have a special (secret) formula of dilution products that we add to the final mix. With Rosewood, we sometimes color parts of the back and sides to mask worm holes and other imperfections of the wood and achieve a perfect match of the back and sides. The final adjustment of the guitar is up to me.
It consists of 2 steps: when the guitar is ready for lacquering, I secure the bridge in order to string her and adjust the soundboard and bridge for perfect tuning (intonation). This is the first time the guitar amplifies the plucking of a string. 2- I tune the guitar and insert my hand in the soundhole to fine tune the struts of the top in order to achieve the best sound, and equilibrium of the voices (Image #51) . This is done after lacquering (Image #50) because the lacquer usually increases the pitch of the instrument. Having followed the construction plans very closely, makes this a labor of microns of a millimeter type of adjustment where very small amounts of wood are filed from the struts. I glue a small piece of sandpaper to the tip of my index finger to get the job right. (Image #51)
A brief history of Bellucci Guitars
Mangore.com started in 1997 as an online classical guitar academy. A unique one of its type presently teaching over 180 all time great classics and guitar technique and theory to thousands of guitar students worldwide. Bellucci Guitars on the other hand started as a one man guitar business in 2004. In the beginning I took the pictures, made the videos for each guitar, answered approximately 50 e-mails every day, maintained the website, checked each single guitar before it was shipped and trained the builders which went to become 8 at some point. Today I only work with 3 Master luthiers and I am constantly training new candidate luthiers.
I started Bellucci guitars quite unexpectedly and quite reluctantly I must add. It all "happened" when one of my online guitar student from the US asked me if I could have a concert guitar built for him by a professional luthier at a reasonable price because, as he bluntly put it, "luthiers and guitar sellers in the US have gone totally crazy !! They ask for huge amounts of money for totally ordinary instruments... most young guitar students cannot afford to buy a concert instrument in the US".
At the time I worked with an old luthier who maintained my concert guitars is top shape and I inquired with him if he would build a concert guitar for me... He did. He built Benjamin's guitar and it was an immediate success. In 2014 Bellucci guitars will celebrate its 10th anniversary and we built over 1,400 instruments to date. Each one of my builders has acquired an immense amount of experience and we have created some amazing innovations as well as perfected many traditional guitar construction techniques. One of Bellucci guitars most valuable innovations is the radiused fingerboard and the violin tie. These have a direct impact on playability and my guitars feel very natural in a guitar player's hands.
A few of my luthiers were not able to keep up with the always increasing demands in the construction of Bellucci guitars and eventually left the firm. Today, only 3 master builders create 7-9 Bellucci guitars every month and each guitar undergoes very demanding standards of construction. One luthier builds one guitar from beginning to end and typically needs 20 days to complete the work on a Hauser braced instrument.
Thanks to the experienced amassed from building many guitars and thanks to the constant learning and the true belief that we work for God, Bellucci guitars have improved on all fronts with each new construction project and it is Bellucci guitars main motto to this day "to surpass the standards imposed by our previous creation". In other words, we are always improving our work. Bellucci guitars is an ongoing project and one I do not see as having an end in sight. Luthery is far from being an exact science and, whenever you build something entirely by hand, you know that you are always prone to obtain different results. There is no way that a mass produced guitar can even come close to the beauty and personality of a hand crafted guitar. Each one of my creations is unique and impossible to replicate. This amazing truth is the main motor that keeps me going each and every single day. A constant pursue of a very elusive perfection that we all know will never be achieved in its entirety but one that we must strive at attaining at all costs.
Going back to Bellucci guitars history, I will say that Paraguay has a long tradition in guitar construction, a skill that the Jesuits brought with them from Spain in the 16th Century, but there was no tradition in exporting quality concert instruments until I appeared on the scene in 2004. I was a 39 year guitar veteran at the time, one of Paraguay's most prestigious musicians and had been married for 14 years and already had my 7th child. I decided to put my Concert Career on hold. It was not fulfilling my life in its entirety and it was having a toll on me. I was coming from playing over 80 concerts a year and I was very tired and disillusioned with a "life on the road". By then, my online lessons on mangore.com recruited literally thousands of students and I was making a very good income doing what I loved the most without leaving "the comfort of my home". It was one of these online students from the US that asked me if I could have a concert guitar built for him. Boy, was he prophetic ?! He started a whole new chapter in my guitar life....
At the beginning, I had no direct contact with the builders whatsoever because a type of local Mafia stood between me and each builder. I did not even know the names of the luthiers that were working for me. I literally referred to them using fictitious names I made up simply to keep track of the work of each one in my notes. This situation lasted for the best part of the first 2 years. My building instructions were passed on to the builders through a third party. The builders on the other hand, were also kept in the dark as to who was giving them so much work. I was tremendously frustrated because my vision of putting Paraguay on the World class instruments map was being seriously challenged. I knew that I had to deal with the builders directly one way or another. I decided to approach an old, semi retired builder, who started working with me along with his 3 sons. The man's name was Lino. I consider him pivotal in the evolution of Bellucci guitars. Most my luthiers are either his sons or relatives.
When the previous group of builders was no longer getting work from me, they made one final effort to try to contact me. One of my guitar labels was left in an instrument that they were touching up. The nephew of one of these luthiers had internet access. He contacted me via e-mail and passed me the necessary data to finally contact and finally meet the original group of builders. Boy, that was the closest I ever got to feel like a spy in Soviet Russia !!
Since 2007 I was able to build the workshop and provide the builders with everything necessary to put out these beauties. As of 2010 Bellucci guitars have attained always higher levels of efficiency and quality control thanks in part to the acquisition of new tools and new construction techniques that in the end benefit both luthiers and players.
Guitar building is my mission in life and God wants me here every morning working hard to improve my skill and fulfilling my mission in life. Today 2 of my 7 children work with me full time. I know now that although guitar construction is a relatively simple thing to do, it is also true that mastery comes from experience and I must admit that although built with love and dedication, Bellucci guitar # 1 is a pale counterpart to Bellucci # 1,370. Practice makes perfect and this is so true in luthery. Today, my 3 master builders each have over 300 guitars on their hands a feat only a handful of luthiers achieve if at all in their life. This is even more amazing when you consider that my oldest builder is 49 years old.
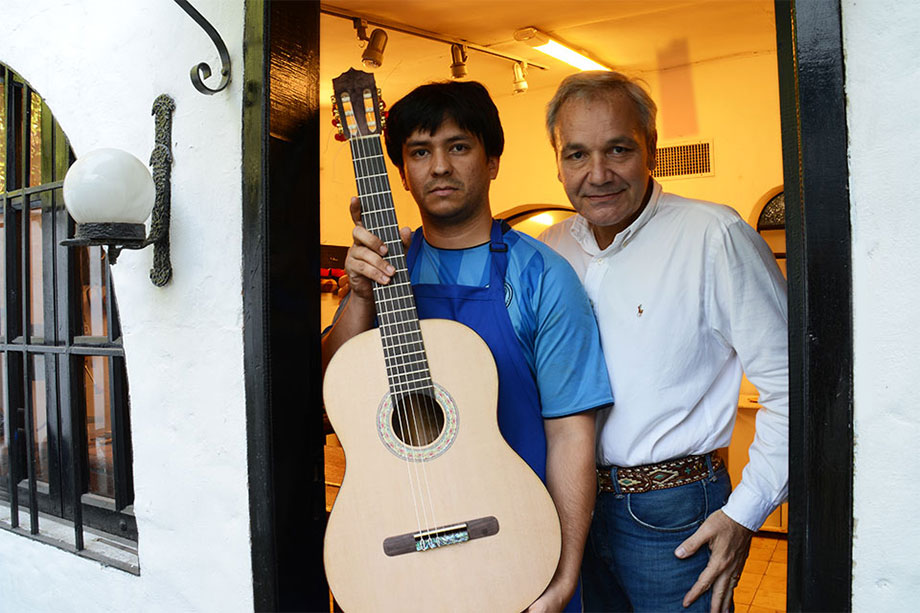
I also had to learn how to become a business man. Knowing how to play the guitar and managing a business are 2 different things. I think I have what it takes to be a good seller but I made mistakes as I made my way. I stand by my guitars and I always act responsibly. I have built and sold over 1,400 instruments since 2004. Here are the rewards I rest on.