Special Techniques
Introduction
This article of mangore.com deals with some very basic and most too often neglected aspects of "intelligent practice". If we think that countless hours of practice are the key to becoming a Master, we are right; they are. But you must also keep in mind that they can create either a musician or a clown. Music is much more an intellectual work than it is often thought. One hour of intelligent practice is better than 8 of stubborn, mindless physical stamina. Think... David and Goliath. One may impress, but the other only needs a well set "punch". Our intellect is our most powerful weapon and, using it correctly, will make us intimately happy.
One of the first challenges for a guitarist is to find the way around some very specific technical "riddles". One of the first challenges that a musician faces is the one posed by Contraction and Extension (Stretching) of the fingers when dealing with notes that break the 4 frets natural spread of the fingers on the fret board. Read all about the left hand and stretches here. We can have different ways to deal with the challenge at hand but, eventually, they will all sum up in 2. The stupid way or the intelligent way. The intelligent way requires more intellectual work while the first more physical work. Typically we have two different types of players: Player one: hard worker but not aware of the work at hand. Player two: hopefully you and me, Hard worker and very aware of the work at hand. Awareness here may also be translated as "Concentrated".
Right Hand technique
Right hand fingers are like the brushes to the painter. Developing arpeggio on the guitar is perhaps the best way to get the right hand fingers to move in a synchronized manner and improve our sound quality and tone colors. Note that the right hand remains in a relaxed position and no energy is wasted in keeping it in a "ready to play position". When the command play is sent from the brain, the given finger(s) close in a fist like motion and, as soon as the string is plucked, they return to a relaxed state until the next command is sent from the brain and so on. Read my in depth analysis of the Right Hand here →
How to bring out notes in chords
Santa Monica, CA, USA. December 10, 2012 & Asunción, June 4, 2014
Being able to bring out notes in chords or arpeggios is a very important technique that will allow you to keep the main notes of a musical passage in the right order of importance. I was first introduced to the technique by Maestro Abel Carlevaro when working Villa Lobos' Prelude # 1.
This passage in Vila Lobos Prelude 1 requires that you be able to make a melodic notes sequence (the F-E-D#) stand out in a chord.
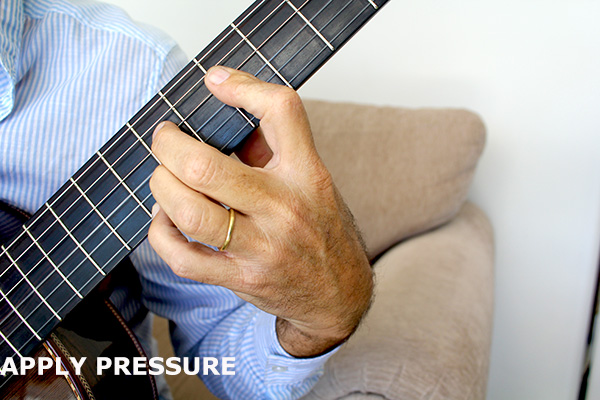
Unless you are the master of your fingers (worry not, it is my intention to eventually make you into one), the note that will want to stand out naturally is the B played by finger a. The piece requires the F played with the m to stand out. See and hear the video above. The way to achieve it is by combining these 2 techniques:
- Bring finger m out more
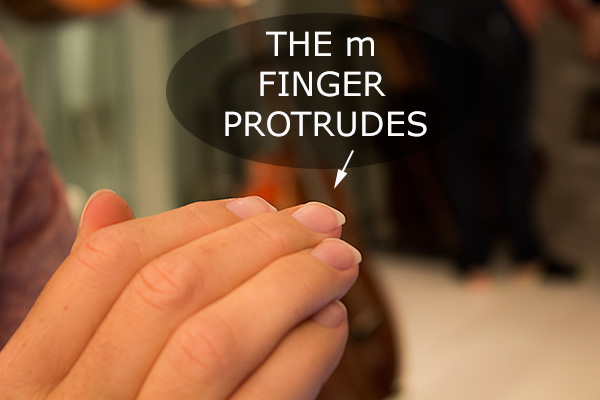
- The other option is to apply fijación. There will be times when the best approach will be to apply a mixture of both protruding the m finger PLUS Fijación. Read all about Fijación here →
Below is another great example taken from Bach Fugue BWV 1000, Staff #19. In the video I mark in different colors the string that carries the main melody that needs to brought out from the pack. Study Fugue BWV here →
Pivot & Lever Explained
Santa Monica, CA, January 25, 2013, Asunción June 4, 2014
San Bernardino, Paraguay, March 16, 2015 12:05, S.D.G.
A lever is a machine consisting of a beam or rigid rod pivoted at a fixed hinge, or fulcrum. It is one of the six simple machines identified by Renaissance scientists. The word comes from the French lever, "to raise" or lift. Levers amplify an input force to provide a greater output force, which is said to provide leverage. The ratio of the output force to the input force is the mechanical advantage of the lever. When dealing with the workings of the left hand, levers come in very handy because they help reduce strain and muscular fatigue exponentially.
Pivots and Levers, help the fingers in the left hand to be in total control so as to help the fingers in the left hand to behave more efficiently and find their way around the fingerboard with greater control. Both terms are self explanatory and watching the video will make it perfectly clear. The efficient use of both pivots and levers will translate in more fluidity and less mistakes in the left hand.
Pivot and Lever Animation
Pivot is an often misunderstood concept. Many guitarists apply it one way or another but not as effectively or consciously as they could.
When you look at other string players, violinists especially, you will see how they use the left hand and arm in a more unified way than we guitarists do. It helps to use one or more fingers as pivots and/or levers to achieve this movements more precisely and to take full advantage of the laws of nature such as gravity and physical concepts such as that of a pendulum.
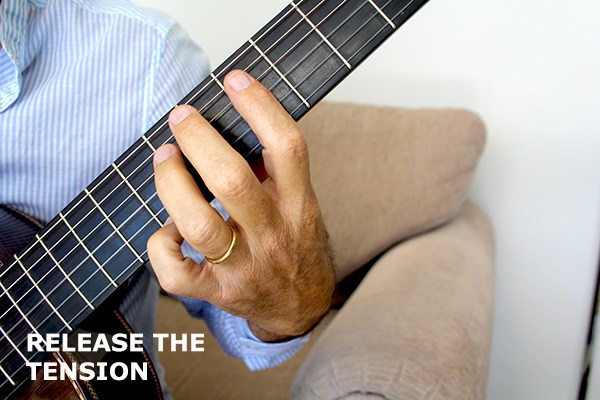
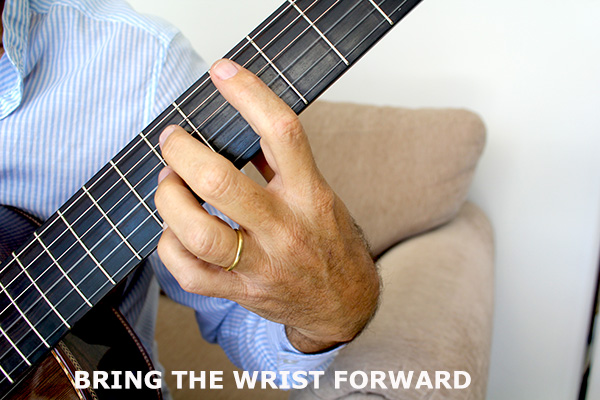
In the example above, finger 4 is the PIVOT onto which the lever will work in order to change of position. This situation is taken from the beginning of the second part of the Bach Gavottes masterclass.
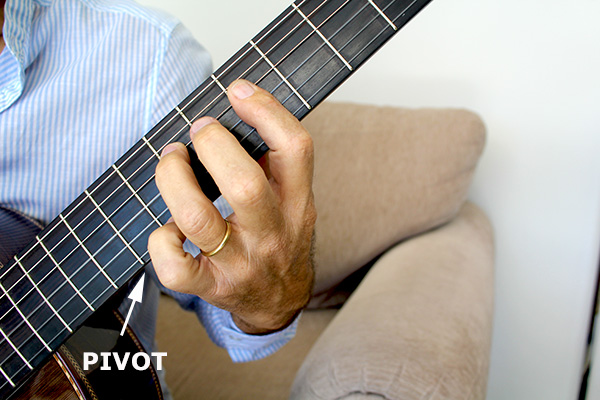
Finger 4 stays on the B while the rest of the hand rotates around it. Notice how the wrist gives way to allow the tendons to place the fingers in the new position. In the pictures below, I show the 3 frames that make the animation above
Below is a great example of a LEVER taken from Queen's Love of My life, staff # 6. Further down is the animation showing how it's done.
To study "Love of My Life", click here →
Below I use a Pivot to rotate the LH in Bach Fugue BWV 1000, staff 19, Study Fugue BWV 1000 here →
How to Avoid Left Hand Squeaks
You must get this in your head once and for all: String squeaks are unbearable and they are one of the main reasons why classical guitarists are often not considered real artists. Just think about it. They are ugly and detract from the beauty of the music you play. In order to get rid of them you must first become very aware of their presence and come to hate them with all your strength.
Imagine that you were playing and someone in the audience made an annoying noise with his mouth every few seconds. I am sure you'd stop and ask that person to "please stop". As a matter of fact, Maestro Andres Segovia did just that in a concert I attended in Bari, Italy. Well, that is exactly the same we do to the audience whenever we throw in a string squeak. It is terribly annoying and the only reason we can stand them is because we become "selectively deaf" to them.
In the video I show you how to avoid string squeaks by lifting the left hand fingers perpendicularly with respect to the strings. The excerpt is from Bach Chaconne in D Minor. The player must make it part of his life mission as guitar players to eradicate this big shortcoming of Classical Guitar Technique altogether. When you practice a new piece or when you examine a piece from your repertoire, you must examine each left hand movement closely and see how and where the squeaks are generated and then find the correct movements that will allow you to achieve the same musical result without damaging the beauty of the music you are trying to bring to life.
Typically string squeaks are generated when a finger is lifted off the fingerboard diagonally with respect to the strings. The obvious solution is to make the lift perpendicularly. To allow for swiftness and speed in the moves, the player must use the whole Playing Apparatus (Fingers, Wrist, Hand, Elbow, Forearm, Shoulder and ultimately, the whole Body) and not limit the playing to the hand and fingers alone. The secret is to practice each change of position very slowly so as to be able to have a clear image in you head of what it is that your hands are doing when they are in contact with the strings and when they are moving around the fingerboard. Close observation of every move is the key.
The example and animation below are taken from staff # 4 in Procol Harum's "A Whiter Shade of Pale". Notice how finger 1 lifts from the low F# in measure 12 perpendicularly with respect to the strings in order to avoid the undesired string squeak.
Below is another great example from Isaac Albéniz Granada where I show how many times is the way we lift the fingers off the fingerboard to cause the unwanted squeak. This type of squeak is more difficult to eradicate and you must fine tune your ear to make sure none goes into your playing. Remember that 99% of string squeaks can be taken care of with the proper attention and technique skill.
Study Granada with me here→
The continuation of this class is in the members area, become a member today.